Red velvet cream cheese recipe. red velvet cake recipe
Hi all. Today I will share with you the recipe for Red Velvet Cake. Yes, I already have one recipe for this legendary cake on the blog, but this time it will not be on vegetable oil, but on yogurt. And this is, so to speak, its light version.
I found this recipe a long time ago on the Instagram page of @shanti_aa, he bribed me with his composition. It does not contain “a liter of butter and a kilogram of sugar”) So I prepared it immediately. And now, I will tell you frankly, I make this cake exclusively according to this recipe.
The biscuit turns out so tender and fluffy, it is weightless like a cloud.
I will describe first the entire cooking process, and then all the nuances of working with such cakes.
So, how to make a Red Velvet cake with yogurt at home with photos step by step.
Ingredients for a mold diameter of 18 cm:
- 95 grams butter at room temperature
- 180 grams of powdered sugar
- 2 small eggs (C2)
- 190 grams of flour
- 4 g strong cocoa (alkalized)
- 1 partial teaspoon of soda
- 0.5 tsp baking powder
- 0.25 tsp salt
- 170 ml. natural yogurt
- 0.5 tsp dry dye (or 1 tsp gel)
Cooking:
Butter at room temperature (you can take 72% for the dough) in a bowl of a mixer and beat together with powder at high speed until white. In my mixer it takes 5-7 minutes.

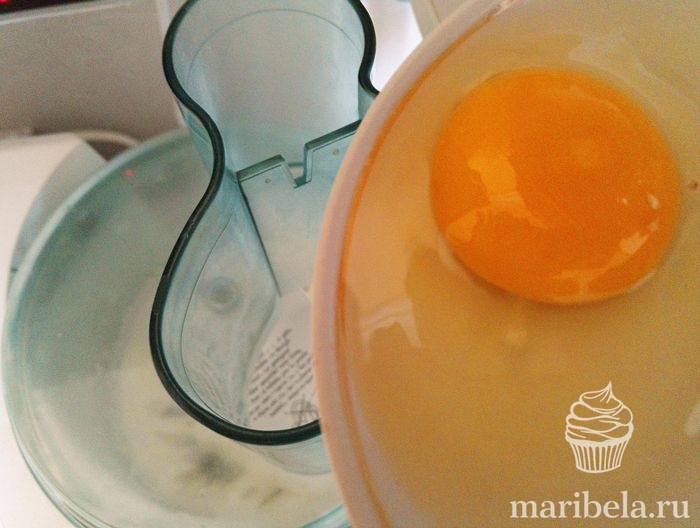
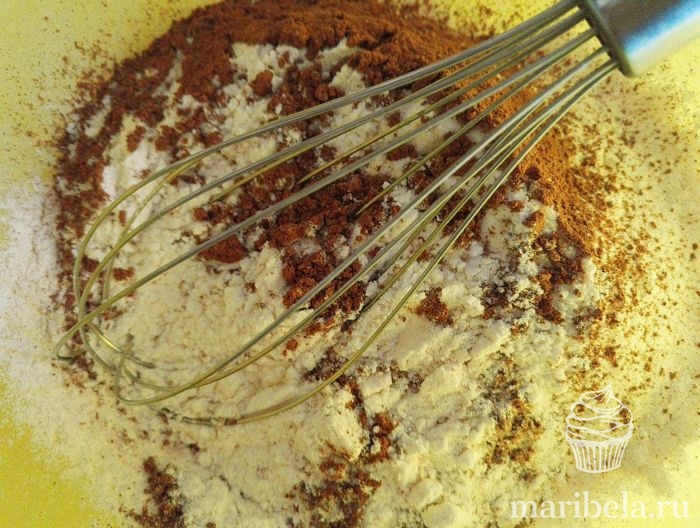
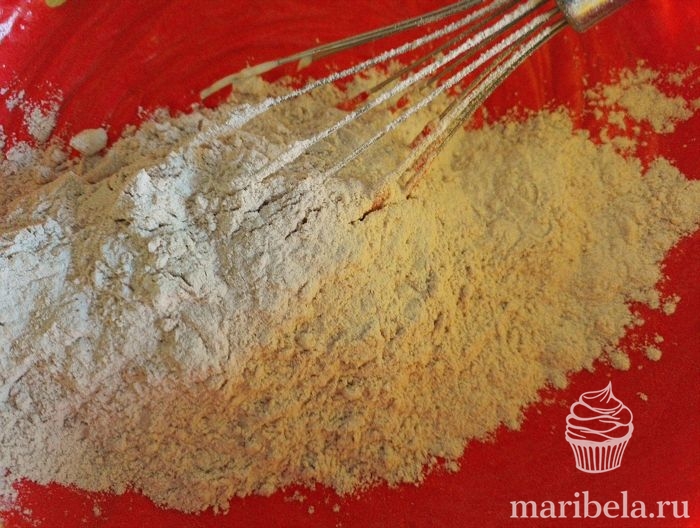
While the butter is whipped, it is necessary to sift all the dry ingredients: flour, cocoa, soda, baking powder, salt. And mix them thoroughly with a whisk.
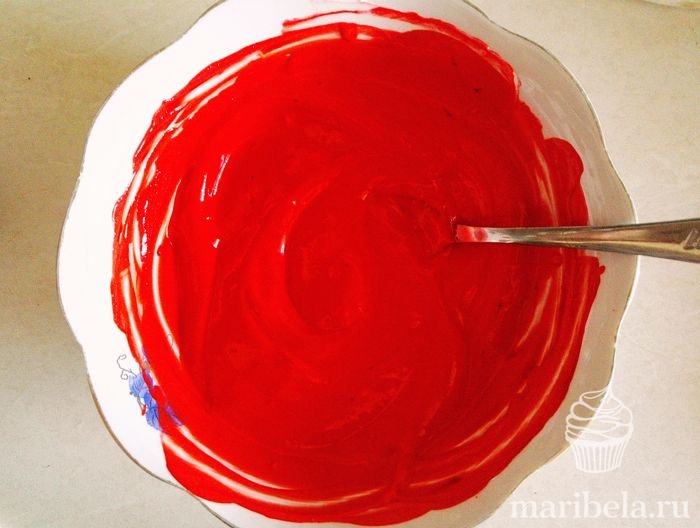
Dissolve the dye in yogurt and leave it for a while.

Yogurt should be natural without dyes, at room temperature. I prepared this biscuit on Greek yogurt, Sloboda yogurt, Danone and Activia. The main thing is that it should not be drinking yogurt. Usually they have a fat content of about 6%. You can also use homemade yogurt if that's what you're into.
Immediately make a reservation, it will not work to paint a biscuit with beet juice. If there is no food coloring in the house, then, unfortunately, Red Velvet cannot be cooked. But, you can find a replacement for it (there are a lot of good recipes on my blog) or just cook it without dye. I have India dye, I bought it by weight in a candy store. It is quite possible to dye with gel dyes, I use Americolor and Top Product.

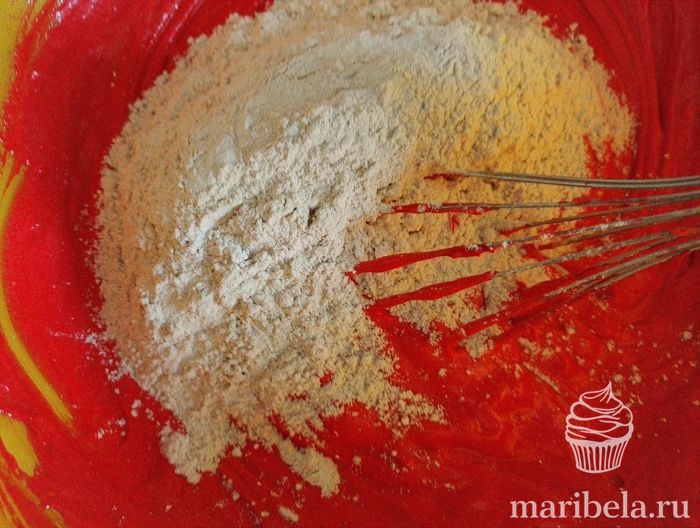
Then add half of the yogurt there, mix again.
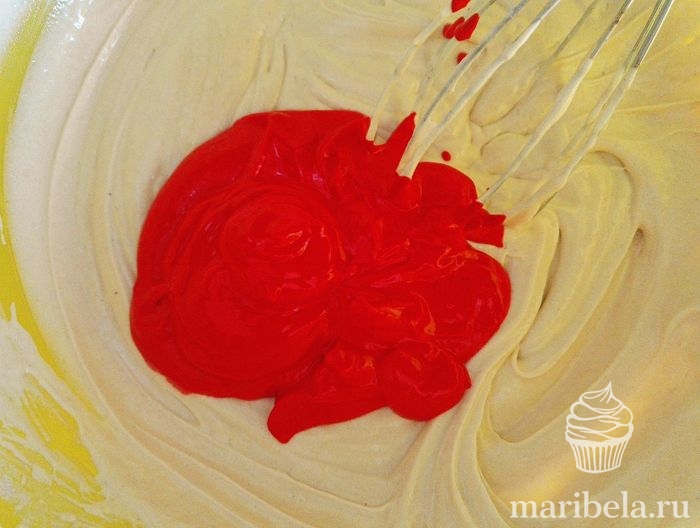
Then again, a third of loose.
Then the rest of the yogurt.

Then loose. Mix well every time.
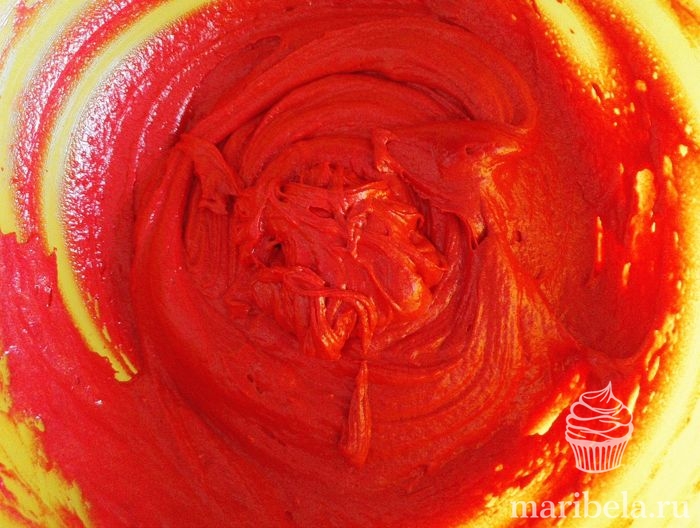
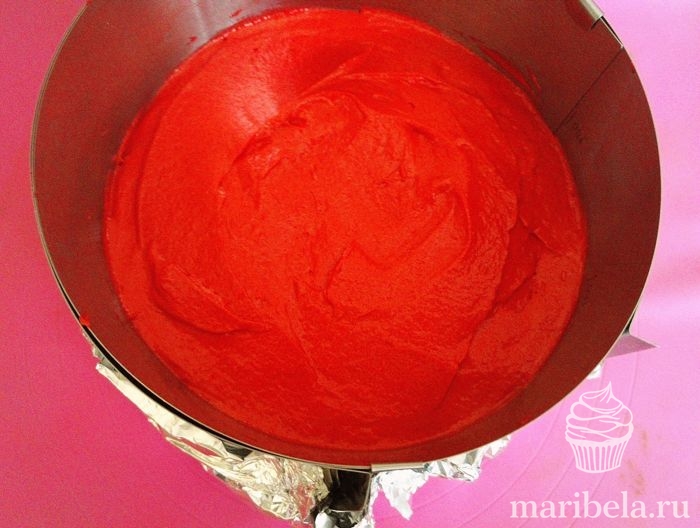
This is the consistency of the test.
I bake in a detachable ring, I don’t grease the sides with anything. I just wrap the bottom in foil.
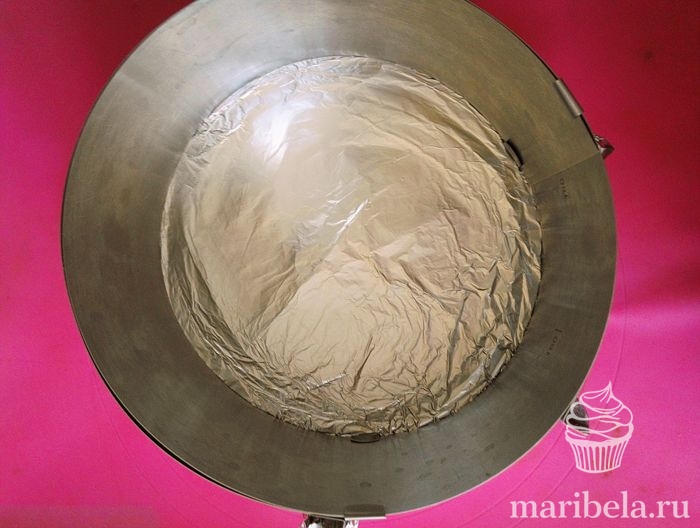
Attention, the cake rises very well. In height, it goes 6-7 centimeters, so do not fill out the form anymore. than half.
We put to bake in a preheated oven to 160º degrees and bake for about an hour. I bake for 50 minutes. So look at the dry splinter. I always focus on the smell, as soon as it smells delicious, I go to check everything.
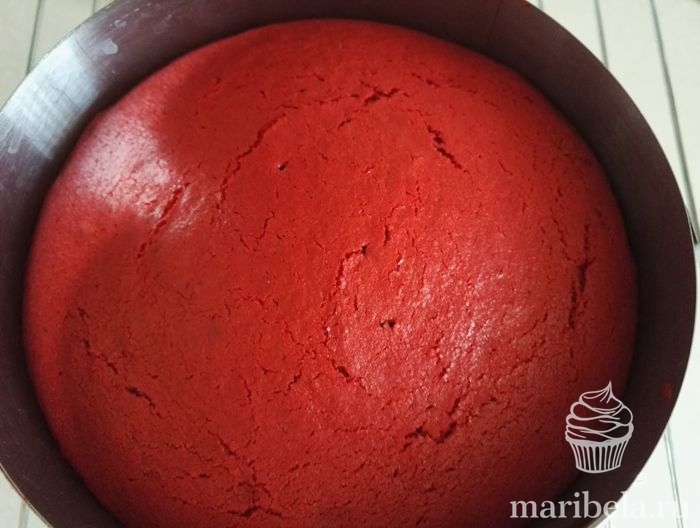
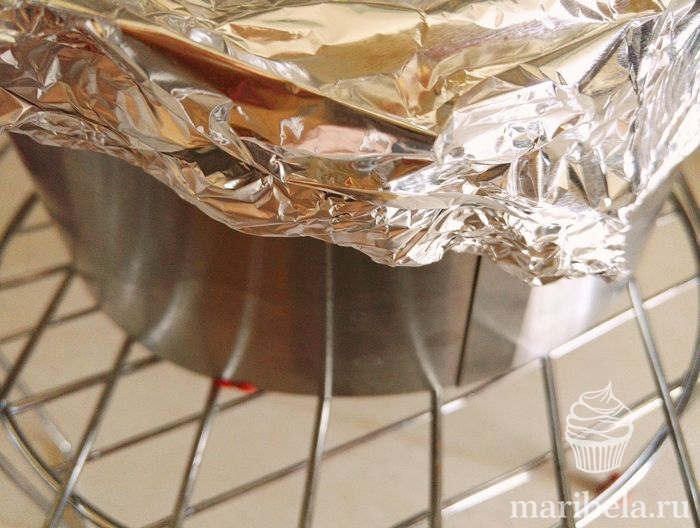
Next, you need to properly cool this biscuit. It must be turned right in the form on a wire rack or on a support in the form of cans, so it must cool completely. The biscuit is very tender, this is done so that it does not settle when it cools.
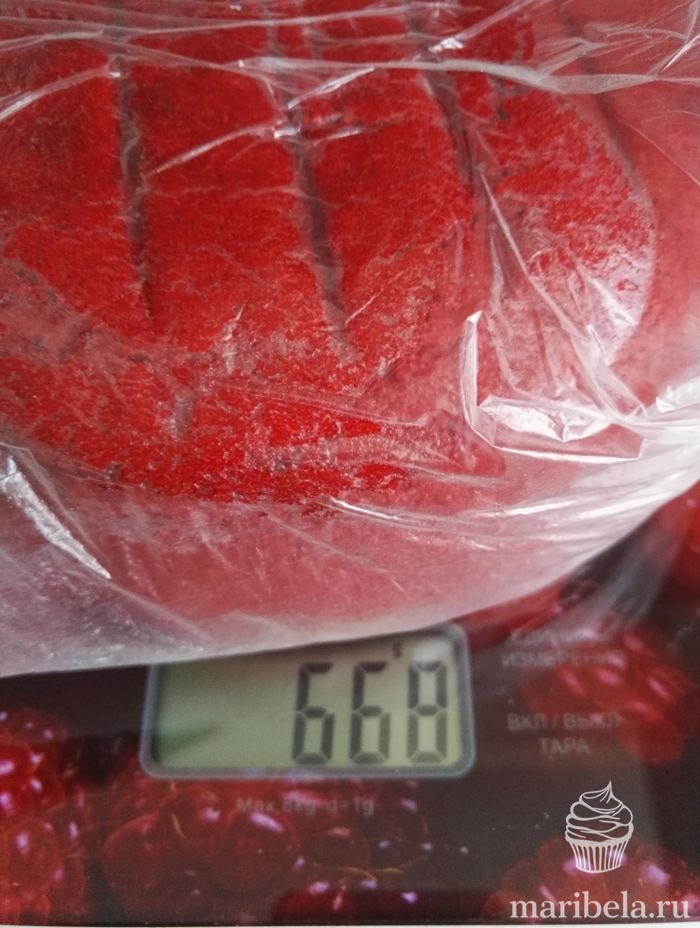
Then, we pass with a knife along the edges of the form and take out the cake. See how tall and wet it is?!
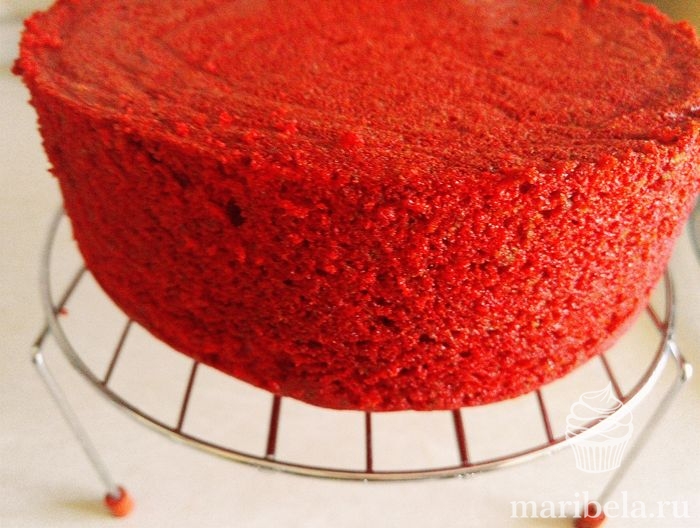
We wrap it in a film and put it in the refrigerator overnight to redistribute the moisture. It turns out as a result of 670 grams by weight.
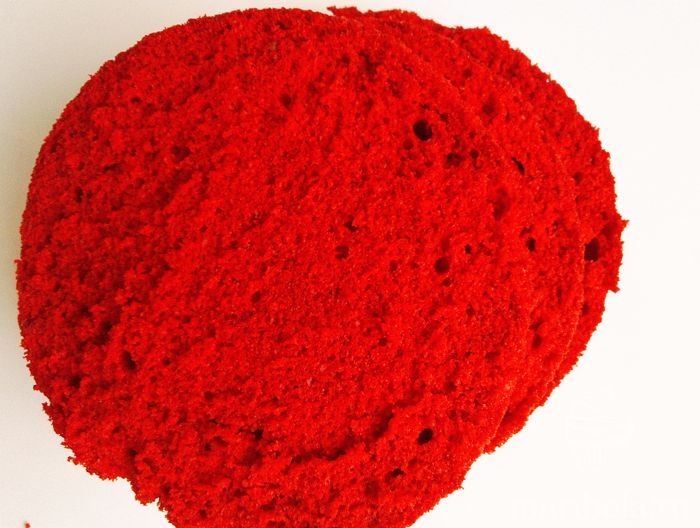
In the morning we cut the biscuit into 3 cakes, here be extremely careful, because the biscuit is sooo delicate, it can break during rough work.
What other nuances are there when working with it?
Well, firstly, it does not contain vegetable oil, therefore the biscuit requires impregnation, but not much! Here you need to know the measure, because because of its airiness, the biscuit absorbs moisture and, having oversaturated it, your cake can “float”, as it happened to me once.
Secondly, the cake is tender, I constantly break off the edge a little when cutting, so we cut it carefully.
Thirdly, it crumbles. Therefore, be sure to make a rough layer, so that later there are no crumbs outside.
Now I'll show you how I assembled this cake.
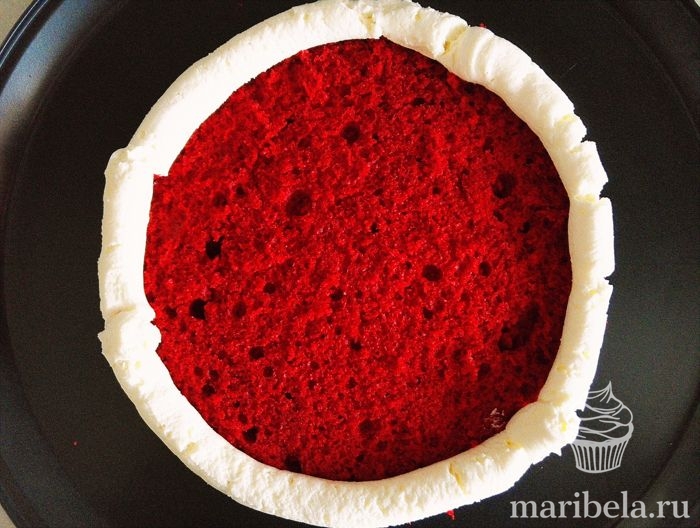
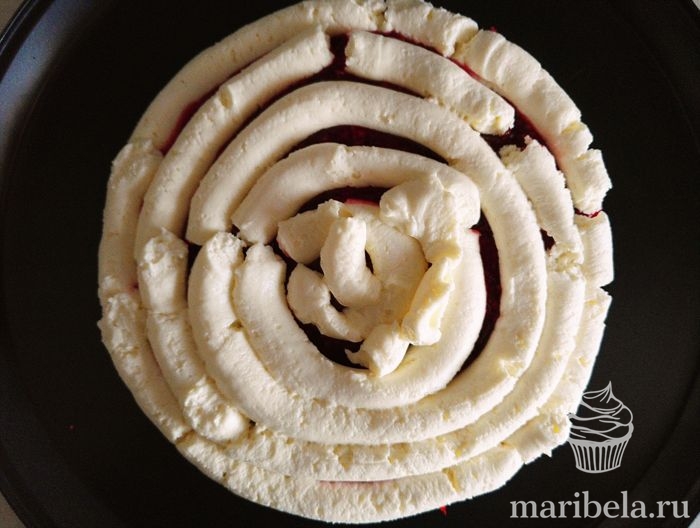
We make a side of the finishing cream along the edge. The cream needs a dense one that holds its shape well and it is convenient for you to work with it in terms of alignment.
It can be either (as in my case), or (all recipes are available via links, just click on the desired name and you will be taken to the page).
Why is it worth making thick cream bumpers? In order for the filling not to flow out of the cake) Make it a rule for yourself, otherwise the cake may “float” or move out.
Then, I laid out the filling in this "well". I specifically decided to put the filling on the biscuit so that it would give its juices there, since I almost did not soak it.
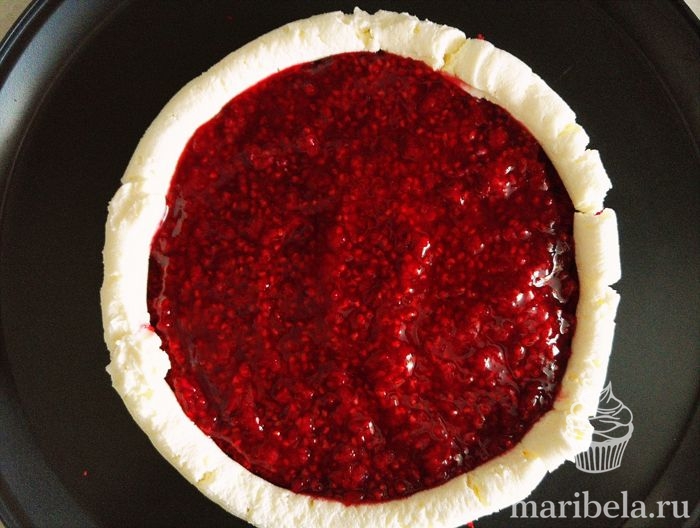
As a filling, I chose raspberry jam. To do this, I took 200 grams of fresh raspberries, 10 grams of water and put in a saucepan over medium heat, boiled for a minute or two. Then 100 grams of sugar was added there (look at your taste) and corn starch - 8 grams. Boiled for another three minutes until thickened. Removed from heat and cooled to room temperature. If you want a pitted filling, then you need to pass the mass through a sieve. Then the amount of raspberries should be increased.
Put cream on top. Leveling the surface.
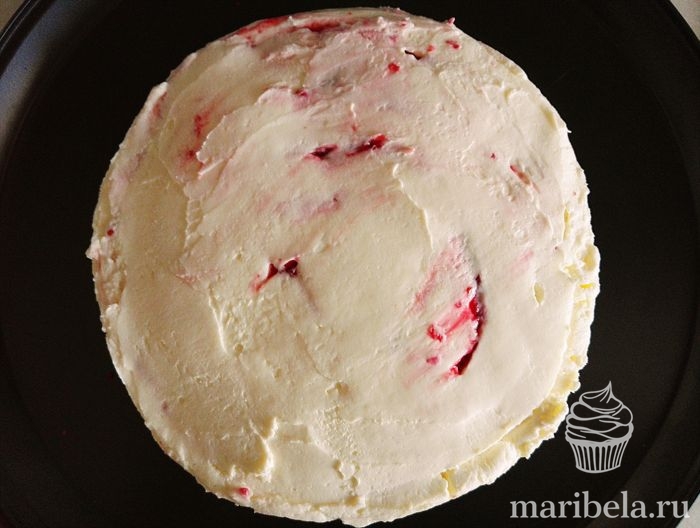
And lay the next cake. So to the end.

Then, immediately apply a rough coating, wrap the cake in a film and put on top the ring or form in which you baked the cake. This is necessary in order for the cake to take the correct shape. You can collect and immediately in the ring, it does not matter, then do as you like.
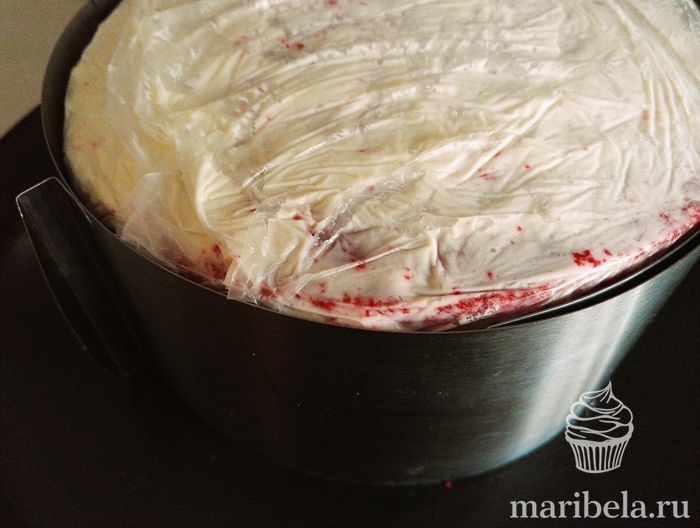
We send the cake to the refrigerator for stabilization. I usually leave it overnight. Still, I recommend always waiting a couple of hours before finishing the coating, because otherwise the cake may look askew or cracks appear on the cream.
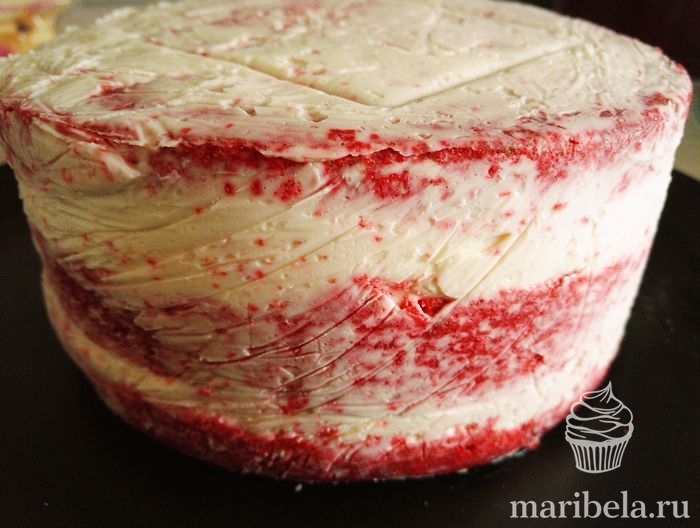
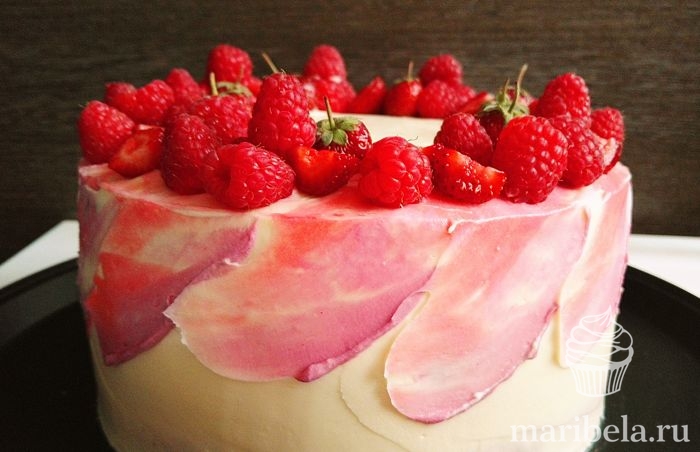
In the morning, remove the ring and align the cake to the finish. Here I used . For a given diameter to cover the cake, you will need 400-500 grams of ready-made cream for coating.
For the filling, I would recommend lighter cream-based creams, this or. These are the perfect options. For the layer you need 600 grams of cream. I didn’t have cream on hand, so in the layer the same one with it is also tasty, but more fat. Thus, for the whole cake, we need about 1 kg of cream.
Here is the cake I made. I made the smears on top with the same cream, coloring it with red and turquoise gel dyes.
And this is a cut. Wet cakes are indecently red, snow-white cream and berry filling. This cake will not leave anyone indifferent.
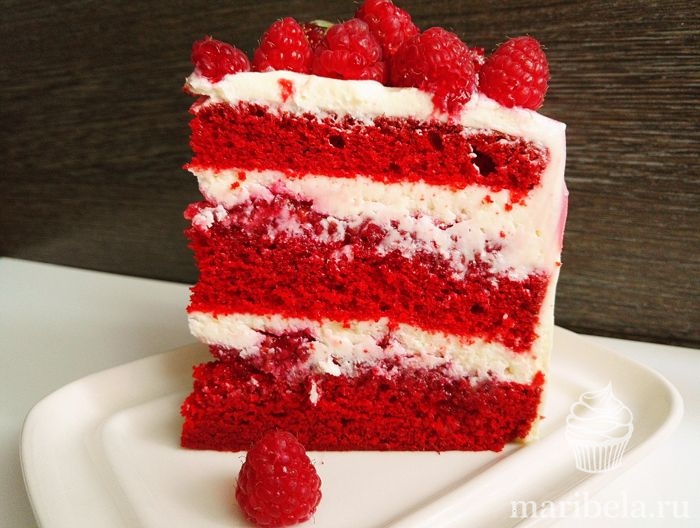
If you're looking for a substitute for the "greasy" vegetable oil version of Red Velvet, then this is the perfect recipe for you.
Be sure to try this cake. I'm sure you'll like it.
Bon appetit.
Cooking time: 1 hour 30 minutes
The cost of 10 servings: 709 rubles
The cost of 1 serving: 71 rubles
Ingredients:
Dough (biscuit cakes):
Butter 220g - 122 rubles
Milk 3.2% 460ml - 29 rubles
Refined vegetable oil 200 ml - 22 rubles
Sugar 700g - 28 rubles
4 eggs - 24 rubles
Flour 680g - 24 rubles
Cocoa 20g - 10 rubles
Baking powder 15g - 15 rubles
Food color gel red 20g - 24 rubles
Refined vegetable oil 20 ml (for lubrication of the form) - 2 rubles
Cream:
Cream 33% 350ml - 133 rubles
Cream cheese 350g – 175 rubles
Vanilla sugar 1 pack (8g) - 6 rubles
White chocolate 100g – 95 rubles
Confectionery topping (balls) for serving

Cooking:
Dough (biscuit cakes):
- Soften the butter first. Warm milk to room temperature.
- Using a dough mixer, mix butter and vegetable oils, granulated sugar.
- Break the eggs into a separate bowl. When the sugar dissolves in the butter and the consistency becomes airy, pour in the eggs and continue to knead the dough.

- In a separate bowl mix flour, cocoa and baking powder. Alternately add a small part of the flour to the dough, and then a part of the milk.
- Gradually knead the ingredients into the dough until they run out. Pour in food coloring, knead until the color is uniform.
- Lubricate two molds with removable sides with vegetable oil. Pour the dough into the molds in equal amounts. Bake cakes in the oven at 150 degrees for 50 minutes.

Cream:
- Whip the cream and then gradually add the cream cheese. The cream should be cold so that it will whip better.
- Bring to a homogeneous airy consistency. Add vanilla sugar, beat.
- Melt the chocolate in a water bath. Pour the chocolate into the cream, mix.
- Let the crusts cool down. Remove from the mold and thinly cut off the top layer - the caked crust. Break into small pieces with your hands.

- Cut each cake in half to make 4 round cakes. Put the pieces from the crust on a baking sheet and put in the oven for 5 minutes at 180 degrees.
- Lay the cake in layers: cake - cream - cake - cream. Repeat the required number of times.
- The top layer should be cream. Grease the cake with cream on the sides.
- Grind the pieces of crust dried in the oven in a blender. Sprinkle the cake on top and a little along the walls.
Serving:
Decorate the cake with confectionery sprinkles (balls).

Bon appetit!
Making a cake with your own hands is not an easy task, especially if you are planning to serve not an ordinary “”, but something more refined and originally decorated to the festive table. Homemade cakes are as popular today as they were many years ago, despite the abundance of confectionery on store shelves. In addition, you can add any ingredients, experiment, combine recipes or make original decor with your own hands, which will make the cake truly original.
It is necessary to approach the preparation of cakes thoroughly, the most important thing in the preparation process is to choose a good master class step by step. It will help you learn the recipe step by step, avoid making mistakes in the manufacturing process, choose the right confectionery tools and make a quality cake. And the master class on the cake recipe "" is no exception.
This MK provides for cheese cream, although the original recipe uses the usual one based on butter. But it is precisely such a cream that will help make the cake juicier, more suitable for decoration, since it takes a well-defined shape with your own hands.

For the test you will need:
- 50 grams of cocoa powder;
- 2.5 cups of sugar;
- 4 eggs;
- 1 heaping teaspoon of baking soda;
- 350 milliliters of kefir of any fat content;
- 450 grams of flour;
- baking powder - a couple of sachets;
- a little salt;
- vegetable oil - 2 cups;
- red food coloring liquid or gel (gel is used in this master class).
We will make cream cheese cream with our own hands as follows:
- cottage cheese cream cheese - 450 grams;
- one and a half glasses of fresh cream 35%;
- a little powdered sugar to taste (about 150 grams);
- flavors are added as desired - vanilla, essence or liquor.
For decoration, you need mastic, for this MK you can make it from condensed milk with your own hands:
- a full glass of powdered sugar;
- 150 milliliters of raw condensed milk;
- 5-7 milliliters of lemon juice;
- from 200 to 300 grams of powdered milk or cream.
This recipe can be called a combination. It is the creamy curd cream that comes in handy both for the layer of cakes and for decorating the finished cake, since the cake will not be covered with mastic, such a cream will help to even out the side surfaces of the product. The dough in this recipe turns out to be quite dense, if you don’t like dryish cakes, then the cream can be made one and a half times more with your own hands for good impregnation of the cakes.
Preparation of cakes and cream
We start with the preparation of cakes - for this we will knead the dough with our own hands:
- Pour the eggs into a deep bowl, without separating the yolks and whites. Gradually add sugar to them and beat for about 7 minutes, until the mass thickens slightly and increases in volume due to foam.
- Pour kefir into a separate container, pour soda into it and stir without vinegar so that bubbles appear.

- Here we pour gel dye into kefir. To make a bright red color, as in MK, you will need about 3 teaspoons. Mix well so that the liquid is evenly colored. The amount of dye can be increased or decreased as desired.
- Then we pour vegetable oil here according to the recipe, be sure to take it without smell and taste, otherwise the cake will resemble a salad.

- In the third bowl we combine the dry part of our dough - this is flour, baking powder, extra salt and cocoa powder. All this stir and sift through a sieve twice.
- We combine all three mixtures into one using a mixer, divide the resulting dough into 2 parts. Two fairly high cakes are baked in a detachable form, at least 22 centimeters in diameter, but be sure to cover with parchment.

- We bake for half an hour at a temperature of at least 180 degrees, first one cake, then the second. When they have cooled on a wire rack, cut each of them into 2 parts so that you end up with 4 identical cakes.
The cream in this master class is quite simple to make, the cake does not require any special frills:
- The cream must be strongly cooled and whipped with a mixer until it becomes paid and stable.
- Water container and combine cream cheese and powdered sugar with a mixer. By the way, you can not use powdered sugar in this recipe at all.
- We connect both masses and let them cool for about half an hour in the refrigerator.
Before assembling the cake, the cakes must be perfectly cold, the cream is taken directly from the refrigerator before decorating. Making the basis for the cake with your own hands is very simple if you use our master class.
Cooking mastic and decorating the cake
The final stage of making a cake according to our MK is the creation of decorations from mastic and the final assembly of the product. There are a lot of master classes for making mastic decorations on the Internet today, so here you can experiment. We offer a simple enough tutorial so that you can decorate your mastic cake with hearts. By the way, such a product will become an original table decoration for Valentine's Day or as a gift to a loved one.
So, how to make mastic, our master class will tell you step by step:
- Mix powdered milk with powdered sugar in a separate dry container. It is best to take a dish or a flat bowl.
- A stream of condensed milk straight from the jar and at the same time mix the mass with a tablespoon.
- Place the resulting mixture on a table sprinkled with powdered sugar and knead with your hands, like dough, until the bridge stops sticking to your hands. If necessary, add powdered sugar or add a little condensed milk so that the consistency of the mastic is just right for this MK.
- Now divide the mastic into two parts, leave one part unpainted (it will be cream-colored due to the inclusion of condensed milk, this can be seen from the MK), color the author with the same red dye that was used for the test. Drip it on the mastic little by little so that the shade does not turn out too intense. Instead of artificial dyes, you can add syrup, such as Cherry or Strawberry, in this case you cannot achieve a bright shade.
When the mastic is ready according to the recipe, start creating figures as in our master class:

- Roll out a layer of white mastic.
- Walk on it with a special rolling pin with a relief, do it only in one direction, tightly presses the rolling pin of the mastic.
- Now cutting out a few blanks in the shape of a heart, then level them with your fingers or a special stack so that there are no nicks.
- In the same way, roll out the Layer of red mastic, as in MK, cut out slightly smaller hearts from it in an amount corresponding to the number of white hearts.
- Then, on the reverse side of the red hearts, apply a special adhesive with a brush, put the smaller hearts on top of the larger ones and lightly press down with your hands.
- Then, according to MK, you can make small white flowers and glue them to the middle of the upper heart.
- In addition, this decor can be decorated with golden beads (edible). They will also stick with a gel.
Now it's time to assemble the cake. How to do this step by step according to MK, read below:
- Top and sides of the cake also level with cream, Use a wide knife.
- On the surface of the cake, make a side of crumbs, as shown in the master class.
- On the side surface, smeared with cream, walk with a special corner to give a beautiful relief.
- Place pre-prepared mastic hearts vertically on the surface of the cake, as in a master class or at your own discretion.
As you can see, creating such a cake with your own hands is not at all difficult. It does not require special skills to work with mastic, the dough and cream are completely ordinary, but the output is a real masterpiece of culinary skill, which, moreover, you created with your own hands.
The very first, original Red Velvet cake, or it would be more correct to call it Red velvet cake, appeared in the distant twenties of the last century. Its parent was the American company The Adams Extract. By the way, she still sells her creation in the form of a dry mixture, from which anyone can bake the masterpiece of the same name. In subsequent years, the fashion for him soared up, then cooled down. There is even a commemorative plaque on the building of New York's Waldorf Astoria Hotel, which says that this is the place where the famous Red Velvet cake was born.
The five most commonly used ingredients in Red Velvet Cake recipes are:
In our country, this cake has gained wide popularity in the last decade. It attracts not only with its taste, but also with absolutely stunning appearance and design. The cake is bright red. Previously, confectioners achieved this with the help of beetroot juice, which also gave more juiciness to the biscuit. Now the cakes are dyed red with ordinary food coloring.
The combination of bright red cakes and white cream cheese enhances the effect produced on any sweet tooth. In its classic form, the cake has three or more layers smeared with white cream. At the same time, the cakes should be perfectly even, as well as the filling layer. From above, the cake can be covered with crumbs from the same cakes. Or smear with cream cheese (necessarily even layer!). They also like to decorate it with fresh fruits and berries, sprinkle it with mirror glaze, decorate it with a culinary syringe.
Five of the fastest red velvet cake recipes:
In general, according to experts, in the United States, the Red Velvet cake was baked long before the appearance of the above company. According to some sources, “velvet” pastries appeared there at the beginning of the 19th century. And it was prepared with the addition of fresh beets and their juice. However, whoever was the “father” of this amazing dessert, it is worth picking up the Red Velvet cake recipe in order to cook it yourself at least once. What do you think?))
Red Velvet Cake is becoming an increasingly common holiday table dessert in the modern world. It consists of biscuit cakes with shades of red or burgundy, soaked in a delicious cream. Cream can be prepared in many ways.
Various aromatic additives are added to the dough and cream: cocoa powder, vanilla, food coloring. Usually the cake is made in a round shape, but if desired, it can be made in the form of a rectangular shape, or in the form of a heart, or in the form of a star.
They allow you to create a beautiful festive dessert from the beginning of dough kneading, baking and to decorating the top layer of the cake and its sidewall. All other moments of making dessert, you will learn from the article.
Red Velvet Cake - a simple and delicious recipe
See the incredibly tender and delicious recipe for American buttercream cake.

Dough Ingredients:
- flour -340 g
- sugar - 300 g + vanillin
- eggs - 3 pcs.
- vegetable oil - 250 g
- kefir or buttermilk - 300 ml
- baking powder - 2 tsp
- soda - 1 teaspoon
- salt - a pinch
- red gel dye - 2-3 teaspoons (AmeriColor 123)
Dough preparation
- In a bowl, mix all dry ingredients: flour, salt, vanilla, baking powder, cocoa and mix.

2. Put soda into a cup with kefir, mix and leave for 2 minutes. Then pour vegetable oil into kefir and mix.

3. After that, pour gel dye into kefir and mix again. We need a bright red color.

4. Beat the eggs with sugar with a mixer until a fluffy white mass. This is approximately 7 - 10 minutes.


dry ingredients.

6. Mix everything well with a mixer and our dough is ready. We divide the dough into 3 equal parts - we will have 3 red cakes.

7. We take a baking dish with a diameter of 22 cm and line it with baking paper, as in the photo.

8. Put 1 part of the dough into a mold, level and bake each cake for 30 minutes at a temperature of 170 degrees C in the oven.

9. We take out the cake from the oven and let it cool.

10. We remove the paper, wrap it in cling film and put it in the refrigerator for several hours. Readiness is checked with a wooden skewer.

As a tip: Bake red cakes in advance, a day before you collect the cake. The cakes ripen and become very tender and soft.

11. These are the beautiful cakes you should get.

Cream Ingredients:
- cream "cheese" - 450 g
- butter -200 g
- powdered sugar - 160 g
- vanilla sugar
As a tip: Butter should be at room temperature, and the cheese cream should be cold.
Cooking cream for cakes
- For cream, take butter at room temperature and beat with a mixer for 2 minutes. Then gradually add vanilla sugar, powdered sugar and beat for several minutes until fluffy.


3. Cheese cream can be made at home. For this you need to take:
- kefir 3% - 0.5 liters
- sour cream 21% - 0.5 liters
- fermented baked milk 4% - 0.5 liters
- lemon juice - 2 tbsp. spoons
Preparation of cream "cheese": In a bowl, combine all the ingredients, add lemon juice, mix. Line a thick linen cloth in a colander and spread the mixture. Tie the fabric and hang in a cool place for 24 hours. You will get a light pasty cream weighing 450 g. Ready to use.

4. You have a smooth, fluffy cake cream. Do not beat for a long time so that the oil does not exfoliate.

Assembling the Red Velvet Cake
- Cut off the top of the cake a little, it will be used for decoration.

2. Knead the cut tops from all the cakes between the fingers until crumbs form.

3. Lubricate the dish with cream for cakes.

4. We spread cream on each cake.

5. Coat the top and sides of the cake with cream, leveling with a long spatula.

6. Sprinkle red crumbs on the top and sides, pressing the crumbs with a spatula to the cream for adhesion.

7. For decoration, we will make a cream from the following ingredients:
- butter - 100 g
- powdered sugar - 100 g
- gel food coloring
Preparation of cream for decoration: Beat soft butter with a mixer. Add powdered sugar and beat on high speed until fluffy. For a soft pink cream, add red gel color to the tip of a matchstick and stir. Or leave the cream white.
8. Place the finished pale pink cream in a culinary bag and, squeezing out, create flowers on top. Then we let our masterpiece soak for at least 4 - 8 hours.

9. We cut off a piece from the finished dessert and see the extraordinary beauty of the product.

Enjoy teatime with Red Velvet dessert. Bon appetit!
Red Velvet - classic recipe with video
You have seen the classic version of the American dessert. Thinking? Go ahead and analyze other recipes.
Red Velvet cake recipe with curd cream
Learn how to make a heart shaped cake. The dessert turns out to be both beautiful and very tasty, consisting of two cakes.

Ingredients:
- 1 cup - kefir
- 2 cups of flour
- 2 tbsp. spoons of cocoa powder
- 1 cup sugar + vanilla
- 100 g - butter
- 3 eggs
- 1 teaspoon - baking soda
- 1 teaspoon - vinegar
- red dye

Cooking red dough so that the Red Velvet cake is beautiful
- Beat well-softened butter with a mixer for 3-4 minutes. While continuing to beat, gradually add the sugar.

2. Now add all the eggs one at a time and continue to beat the mass.

3. Pour half a glass of kefir into a bowl, and add 1 tbsp to the rest. a spoonful of dye. Stir the dye with a spoon in a glass.

4. Add the mixed dye with kefir from the glass to the bowl and mix everything. The mass has a rich red color.

5. Pour cocoa powder into the bowl and mix again with a mixer. Pour out the vanilla.
6. Pour vinegar into baking soda to extinguish.

7. Carefully mix soda with vinegar with a spoon.
Let's put it aside for now and pick it up later.

8. Sift the flour in parts into a bowl and mix.

9. Mix the flour gently with a mixer in parts. Add the extinguished baking soda and mix again.

10. Divide the dough into two parts. We put one part in a baking dish in the form of a “heart” and put it in the oven, heated to 200 degrees C for 25 minutes. Then we bake the second cake.
The silicone mold, when filling with dough, does not need to be lubricated with anything.

Assembling and decorating the cake
- We take out the cake from the oven. We see that he is well baked.

2. We turn over the silicone mold and the cake separates well from it.

3. Cut off the top of the cake to create crumbs.

4. Here we see such a porous and tender cake after cutting off the top.

5. Break the cut part and put it in a blender to grind and get velvet crumbs.

We will need:
- cottage cheese of any fat content and in any quantity (here 250 g)
- butter - 2 times less than cottage cheese
- vanillin and powdered sugar - to taste (2-4 tablespoons)
6. We made cottage cheese cream when we watched the video. Spread curd cream on the top of the first cake.

7. We close the smeared first cake with the second cake.

8. Well coat the sides and top of the cake with cream with a spatula. Then we begin to sprinkle with red crumbs, slightly pressing it to the cream.

9. We decorate the top of the dessert with velvety crumbs.

10. In addition, we apply small flowers for decoration.

Here we have such a beautiful Red Velvet.
Red Velvet Cake with Biscuit Velor - a recipe for a cake with a new taste
In this recipe, you will learn the effect of biscuit velor.

Ingredients:

Dough preparation
- If you do not have such a planetary mixer, as in the photo, use your regular one. Place softened butter in a bowl and beat until fluffy.

2. As soon as the oil has brightened, add granulated sugar.

3. We begin to beat the butter with sugar until smooth.

4. Then, one by one, lower the eggs and beat in turn.

5. Now add half a serving of kefir and mix again.

6. Let's get to the dry ingredients. Add cocoa powder and baking powder to the sifted flour. Mix everything well with a whisk.

7. Send half of the mixed dry ingredients to the egg-butter mixture in the blender bowl. We mix everything.

8. Now we send the remaining kefir to the bowl and mix everything again.

9. Add the rest of the dry ingredients. Mix everything again.

10. We take out the dye and add it to our test. We mix. The effect of red bright color is achieved. The dough is ready.

Cake baking
- We get a baking sheet. We spread the foil on it, folding it in half. We put an integral baking ring with a diameter of 16 cm on the foil. We wrap the ring with the edges of the foil up, as in the photo.
- First, divide the dough into 3 cakes, preferably with the help of scales. We place one part of the dough in our ring. We send it to the oven, heated to 150 degrees C for 30 - 40 minutes. Readiness is checked with a wooden stick.

3. We take out the cakes in the rings from their ovens - they are still hot.

4. Carefully unfold the foil and take the rings up. These are such beautiful cakes. Red Velvet Cake should be red and beautiful.

5. We wrap warm cakes in cling film.

By wrapping the cakes in a film, we create conditions in which moisture is evenly distributed throughout the cake and does not go anywhere. Leave it like this until it cools down to room temperature. Then they need to be put in the refrigerator for 3 hours.

Cooking cream cheese cream
- Butter, room temperature (130 g), beat with sifted powdered sugar (160 g). Punch the mass with a mixer until smooth.

2. When the oil has brightened, add cottage cheese and cream cheese (560 g) and stir everything with a mixer until smooth. Remember - cottage cheese and cream cheese should be very cold.

3. We put a confectionery bag on a glass and put the prepared cream into it.

Assembling the Red Velvet Cake
- We have 3 cakes. Each cake is cut into 2 parts. The integrity of the cake will consist of 5 cakes, the sixth part will go to the crumbs. In addition, we cut off the upper part from all the cakes and also send it to the crumbs.

2. We knead the crumb in our hands and fill the baking sheet, which we put in the oven, heated to 100 degrees C for 40 minutes. The crumb should dry out. Grind dry crumbs in a blender.

3. We collect cakes on a rotating table. We coat each cake with cream, as in the photo.

4. Squeeze the cream out of the bag onto the side walls.

5. Level the cream on the sides and top with a spatula.

6. Using a silicone brush, apply red chips to all surfaces of our cake.

7. We decorate the upper part with flowers.

As you have already noticed, the velvet crumb is of a different size and corresponds to the concept of "velor". Cake dessert with red velor effect is ready.
How to decorate a Red Velvet cake with New Year's motifs - video
I assume that while viewing all the recipes, you fell in love with Red Velvet and he made a positive impression on you.